
Comprehensive Guide to Assigning and Managing Databases in Avocadat
Welcome to our detailed guide on how to effectively assign purchased databases to users and create customized plans within Avocadat. This guide is designed to help you streamline your CRM management, ensuring that your users have access to the specific data they need.
Watch the video above for a visual walkthrough of the database assignment and plan creation process in Avocadat.
1. Assigning a Purchased Database to a User
Navigate to the Customers section in your CRM dashboard.
Locate and click on the Database Icon next to the user you wish to assign a database to.
Ensure the desired database is listed under the Purchase Database section. Note that if a database isn't assigned to your white label, it won't appear here.
Select the appropriate database and assign it to the user by clicking the Assign button.
Only databases that have been purchased and are available under the Purchase Database section can be assigned to users.
2. Pre-Building a Plan with a Specific Database
Navigate to the Ad Plans section within Avocadat.

Create a new plan by clicking on the Add New Plan button.
Name your plan appropriately. For example, "Motor Vehicle Accident Live Intent".
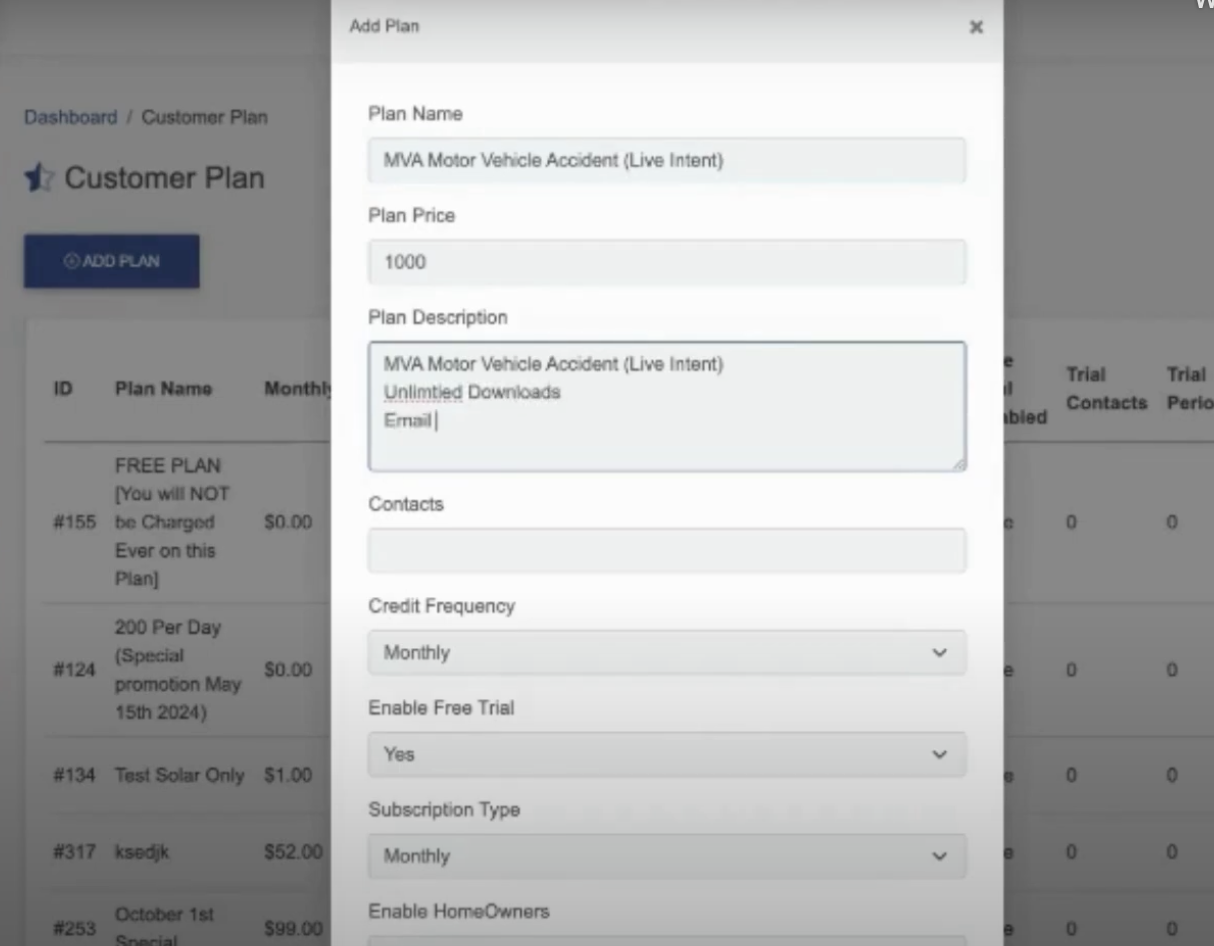
Set the default price for the plan. For instance, $1,000 for a downloadable mailing list.
Customize the plan details as needed. Utilize tools like ChatGPT to help refine and structure your plan effectively.
Access the settings to enable or disable specific databases. For example, disable databases related to B2B or Homeowners if the focus is solely on Motor Vehicle Accidents.
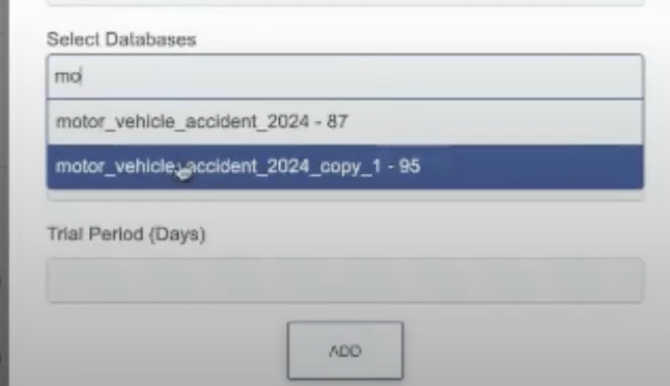
Add the Motor Vehicle Accident database to the plan.
Disable any unnecessary options, such as the Free Trial, to streamline the user experience.
Click Add to save the new plan.
The newly created plan will now appear on your pricing page. When users sign up for this plan, they will have access only to the Motor Vehicle Accident database.
3. Tips for Effective Database Management
- Organize Databases: Clearly name and categorize databases to prevent confusion and ensure easy navigation.
- Limit Access: Assign databases specifically to users who need them to maintain data security and relevance.
- Use Automation: Leverage tools like ChatGPT to assist in refining and managing your plans efficiently.
- Regularly Update: Keep your databases and plans updated to reflect the latest information and meet user needs.
- Monitor Usage: Track which databases are being accessed to optimize your resources and plan offerings.
4. Conclusion
By following this comprehensive guide, you can effectively assign purchased databases to users and create tailored plans within Avocadat. This ensures that your users have access to the specific data they need, enhancing their experience and improving the overall efficiency of your CRM system. Incorporate these practices to optimize your database management and provide a seamless experience for your customers.