Introduction
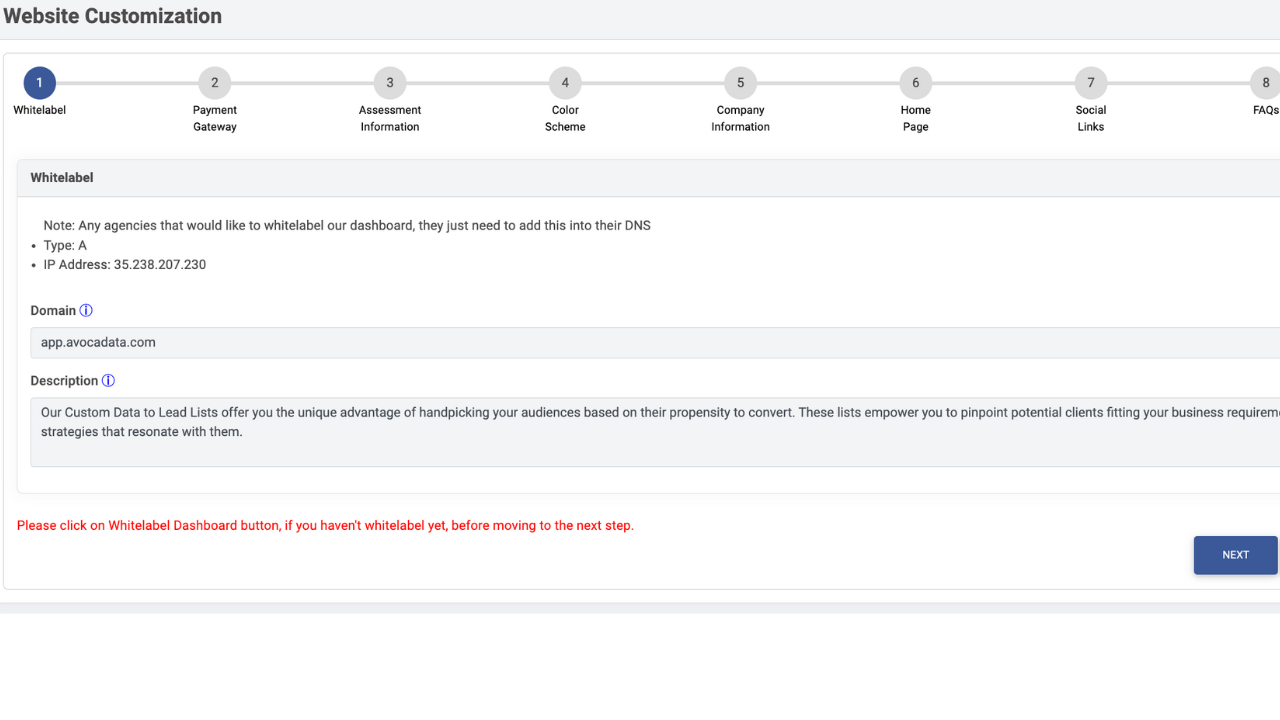
Hello everyone, this is Brian from Avoc Data. In this guide, we'll walk you through customizing your website for your white label. If you've watched our previous videos, you already know how to activate your domain and connect your DNS to an A-record IP address. Once that's set, you'll access the white label dashboard. Let's dive into the customization process.
Planning Your Website
Assuming you've connected your DNS and set up your Stripe or Authorize.net accounts, you're ready to start customizing your website. Begin by accessing the homepage information from the dashboard.
Establish Your Foundation
- Domain Setup:
- Connect your domain by pointing the A-Record to your hosting server’s IP address.
- Verify the domain connection to ensure it's active.
- Payment Integration:
- Ensure your Stripe or Authorize.net account is authorized and connected for seamless transactions.
- Access the Admin Panel:
- Log in to your white label platform’s dashboard to begin the customization process.
Setting Up Customer Plans
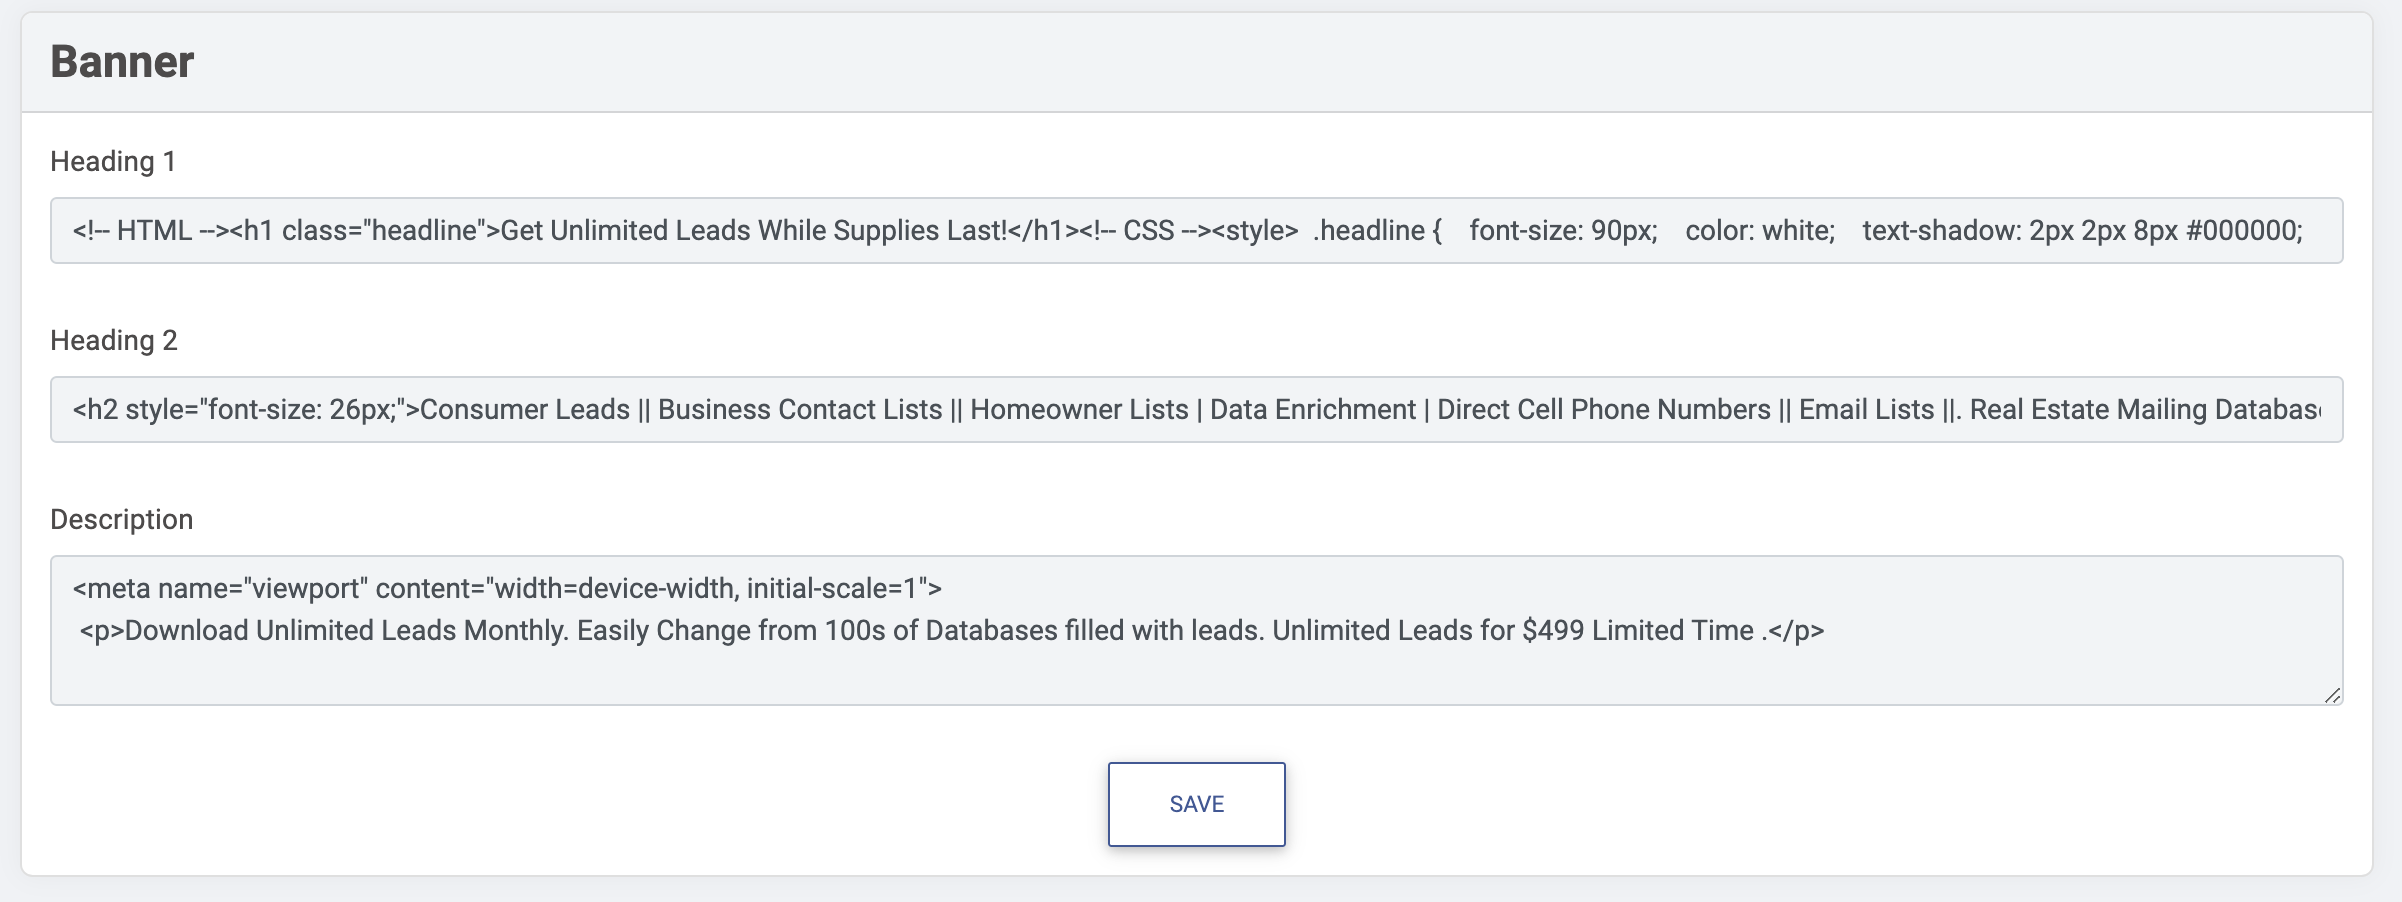
Customize your website's offerings to suit different customer needs. For instance, you can modify the website title to something like "Purchase Email List Data for One Penny" to attract specific clientele.
Develop Subscription Models
- Create tiered pricing plans to cater to various customer segments.
- Offer discounts for annual subscriptions to encourage upfront payments.
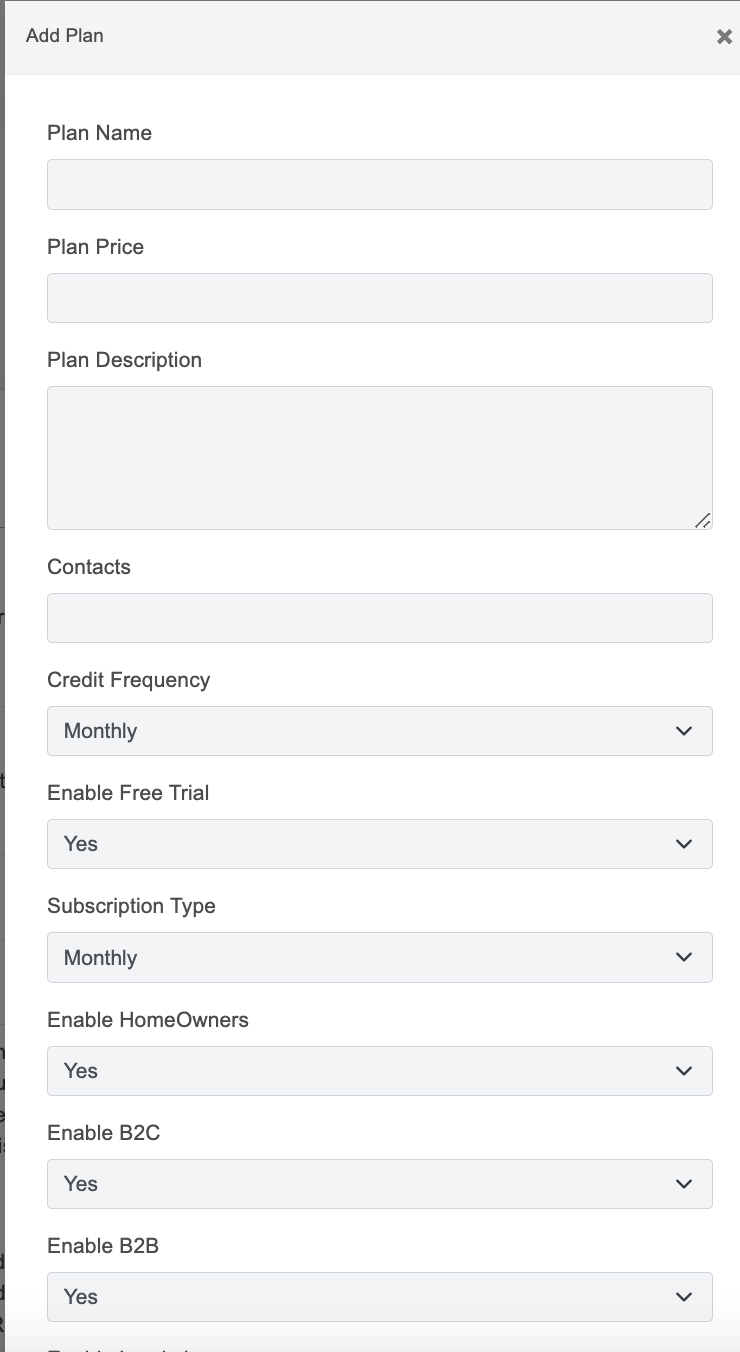
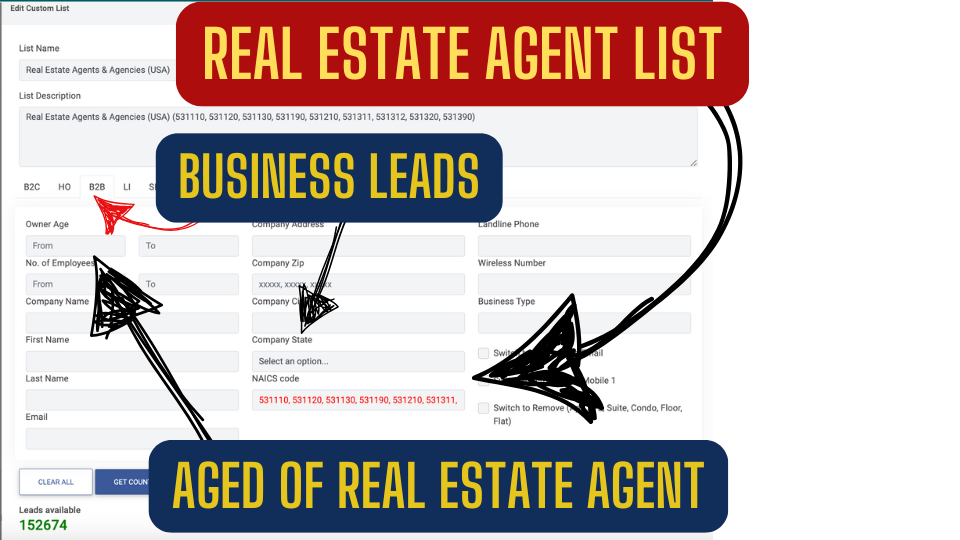
Add Custom Database Plans | Agency Plan
Select Which database you want to assign to a specific package. Users who subscribe to that package will get these databases under custom databases.
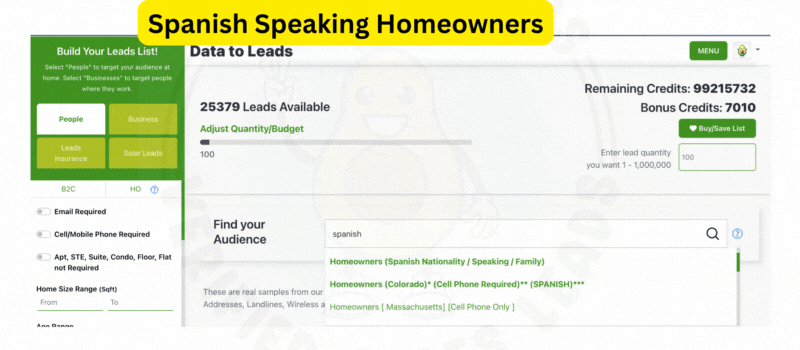
Creating Custom Lists
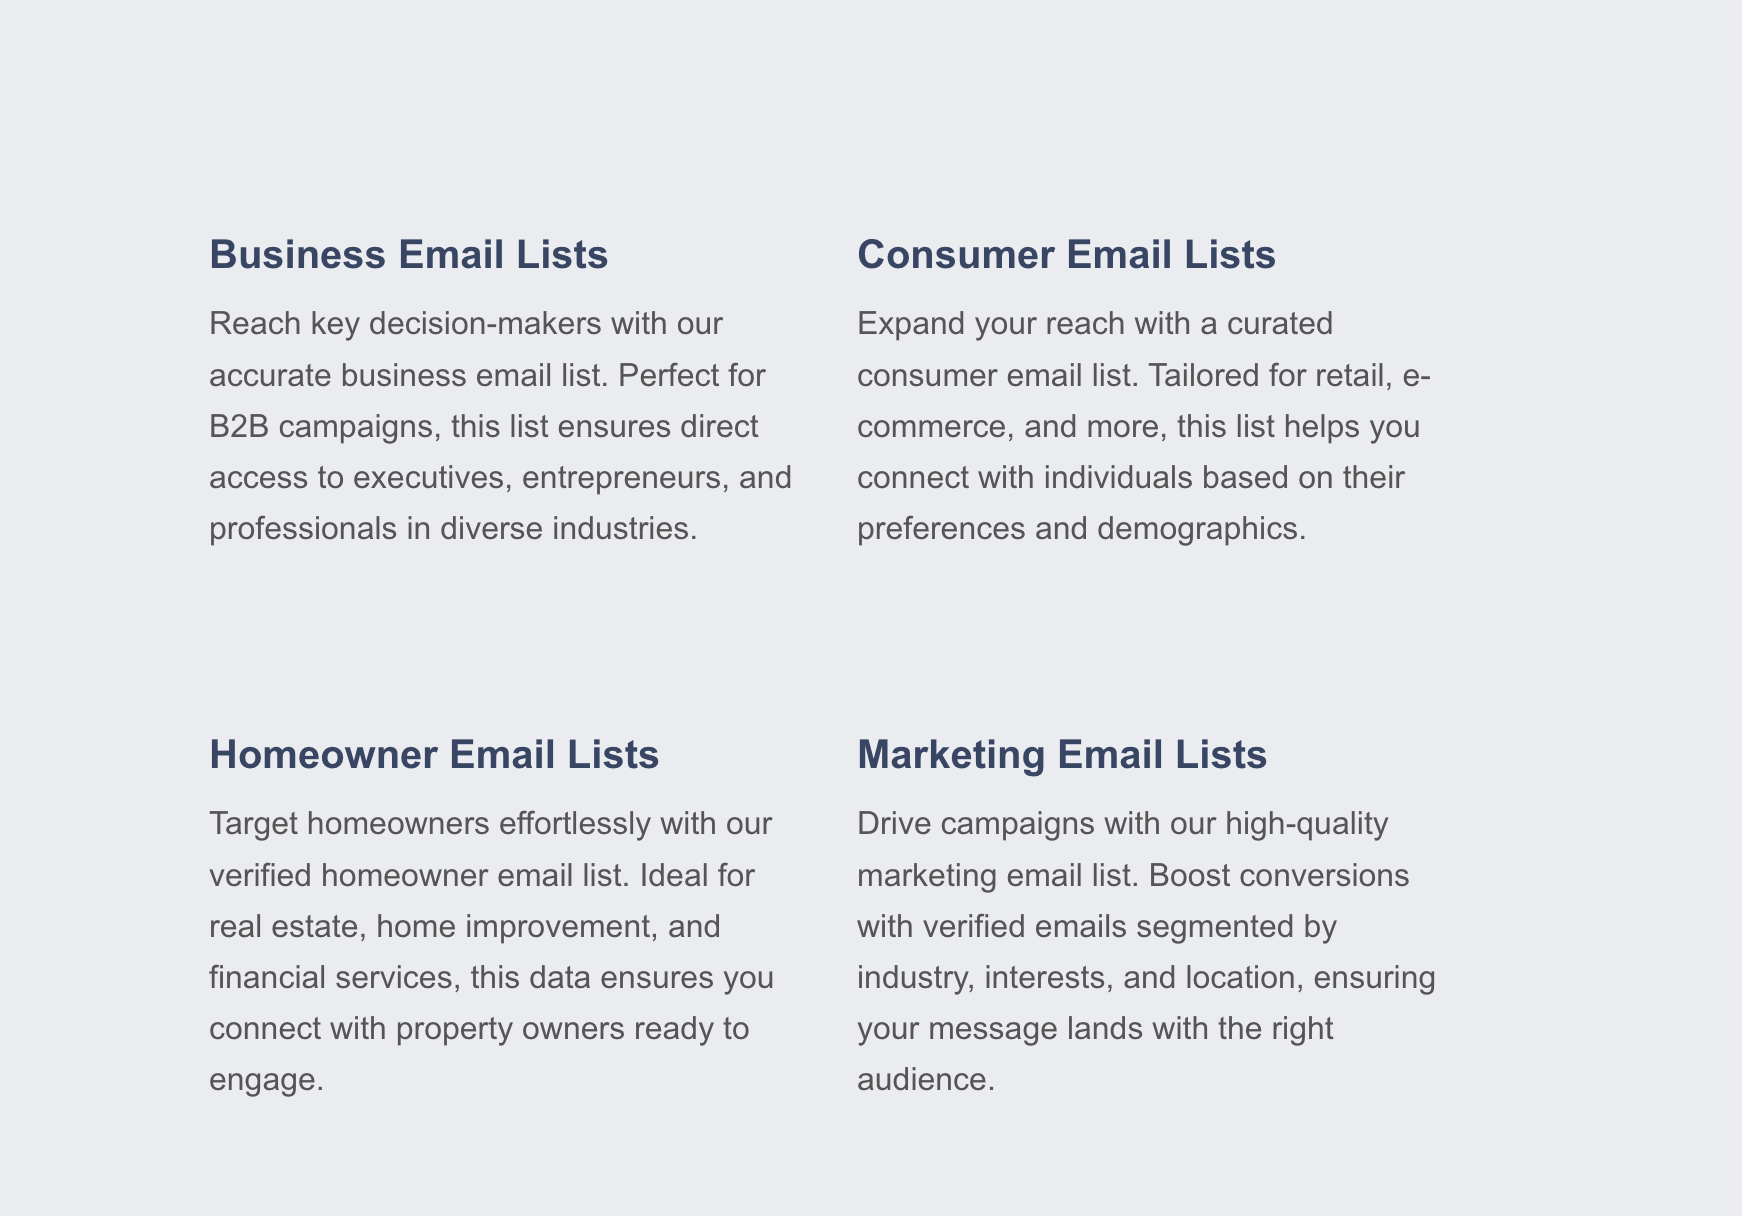
Implement customizable options for your data marketplace. Allow clients to filter data sets based on industries, locations, demographics, and other relevant criteria.
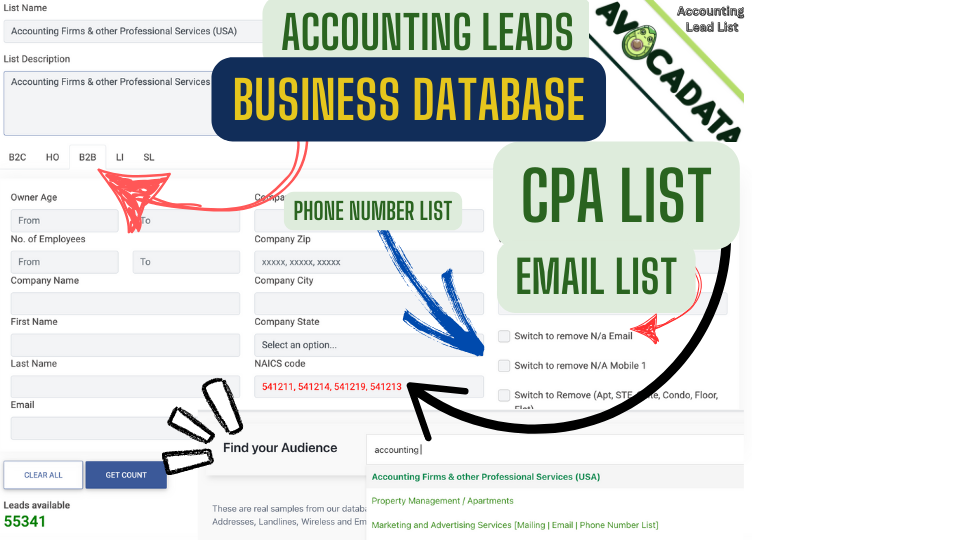
Data Marketplace Features
- Enable clients to browse and purchase data sets directly from your site.
- Add customizable filters to help clients find the data they need efficiently.
Build Lists of Real Estate Agents and Accounting Leads
Editing Website Information
Customize the content on your website to align with your branding and objectives. For example, change the website title to "Purchase Email List Data for One Penny" to clearly communicate your offering.
Content Development
- Research competitor websites to gather ideas and identify effective keywords.
- Create an HTML structure list to organize your content efficiently.
- Copy and paste the structured content into your website editor.
- Adjust margins and alignment to ensure a clean and professional layout.
Integrating Multimedia
Enhance your website with high-quality images and videos to make it more engaging and visually appealing.
Visual and Interactive Elements
- Create custom-sized images using Canva to fit your website’s design.
- Download images in PNG format for optimal quality.
- Remove any unwanted white parts from images to maintain a clean look.
- Upload the edited images to your website and position them appropriately.
- Ensure all interactive buttons redirect correctly to the intended pages, such as the registration page.
Organizing and Cleaning Up
Streamline your website’s layout to enhance user experience. Remove any unnecessary elements and ensure that the design remains consistent throughout.
Layout Optimization
- Ensure all images are in PNG format for consistency and quality.
- Remove any image links that cause unwanted display issues, such as weird boxes.
- Refresh the page to verify that the layout looks clean and professional.
- Adjust section sizes as needed to accommodate new images and content.
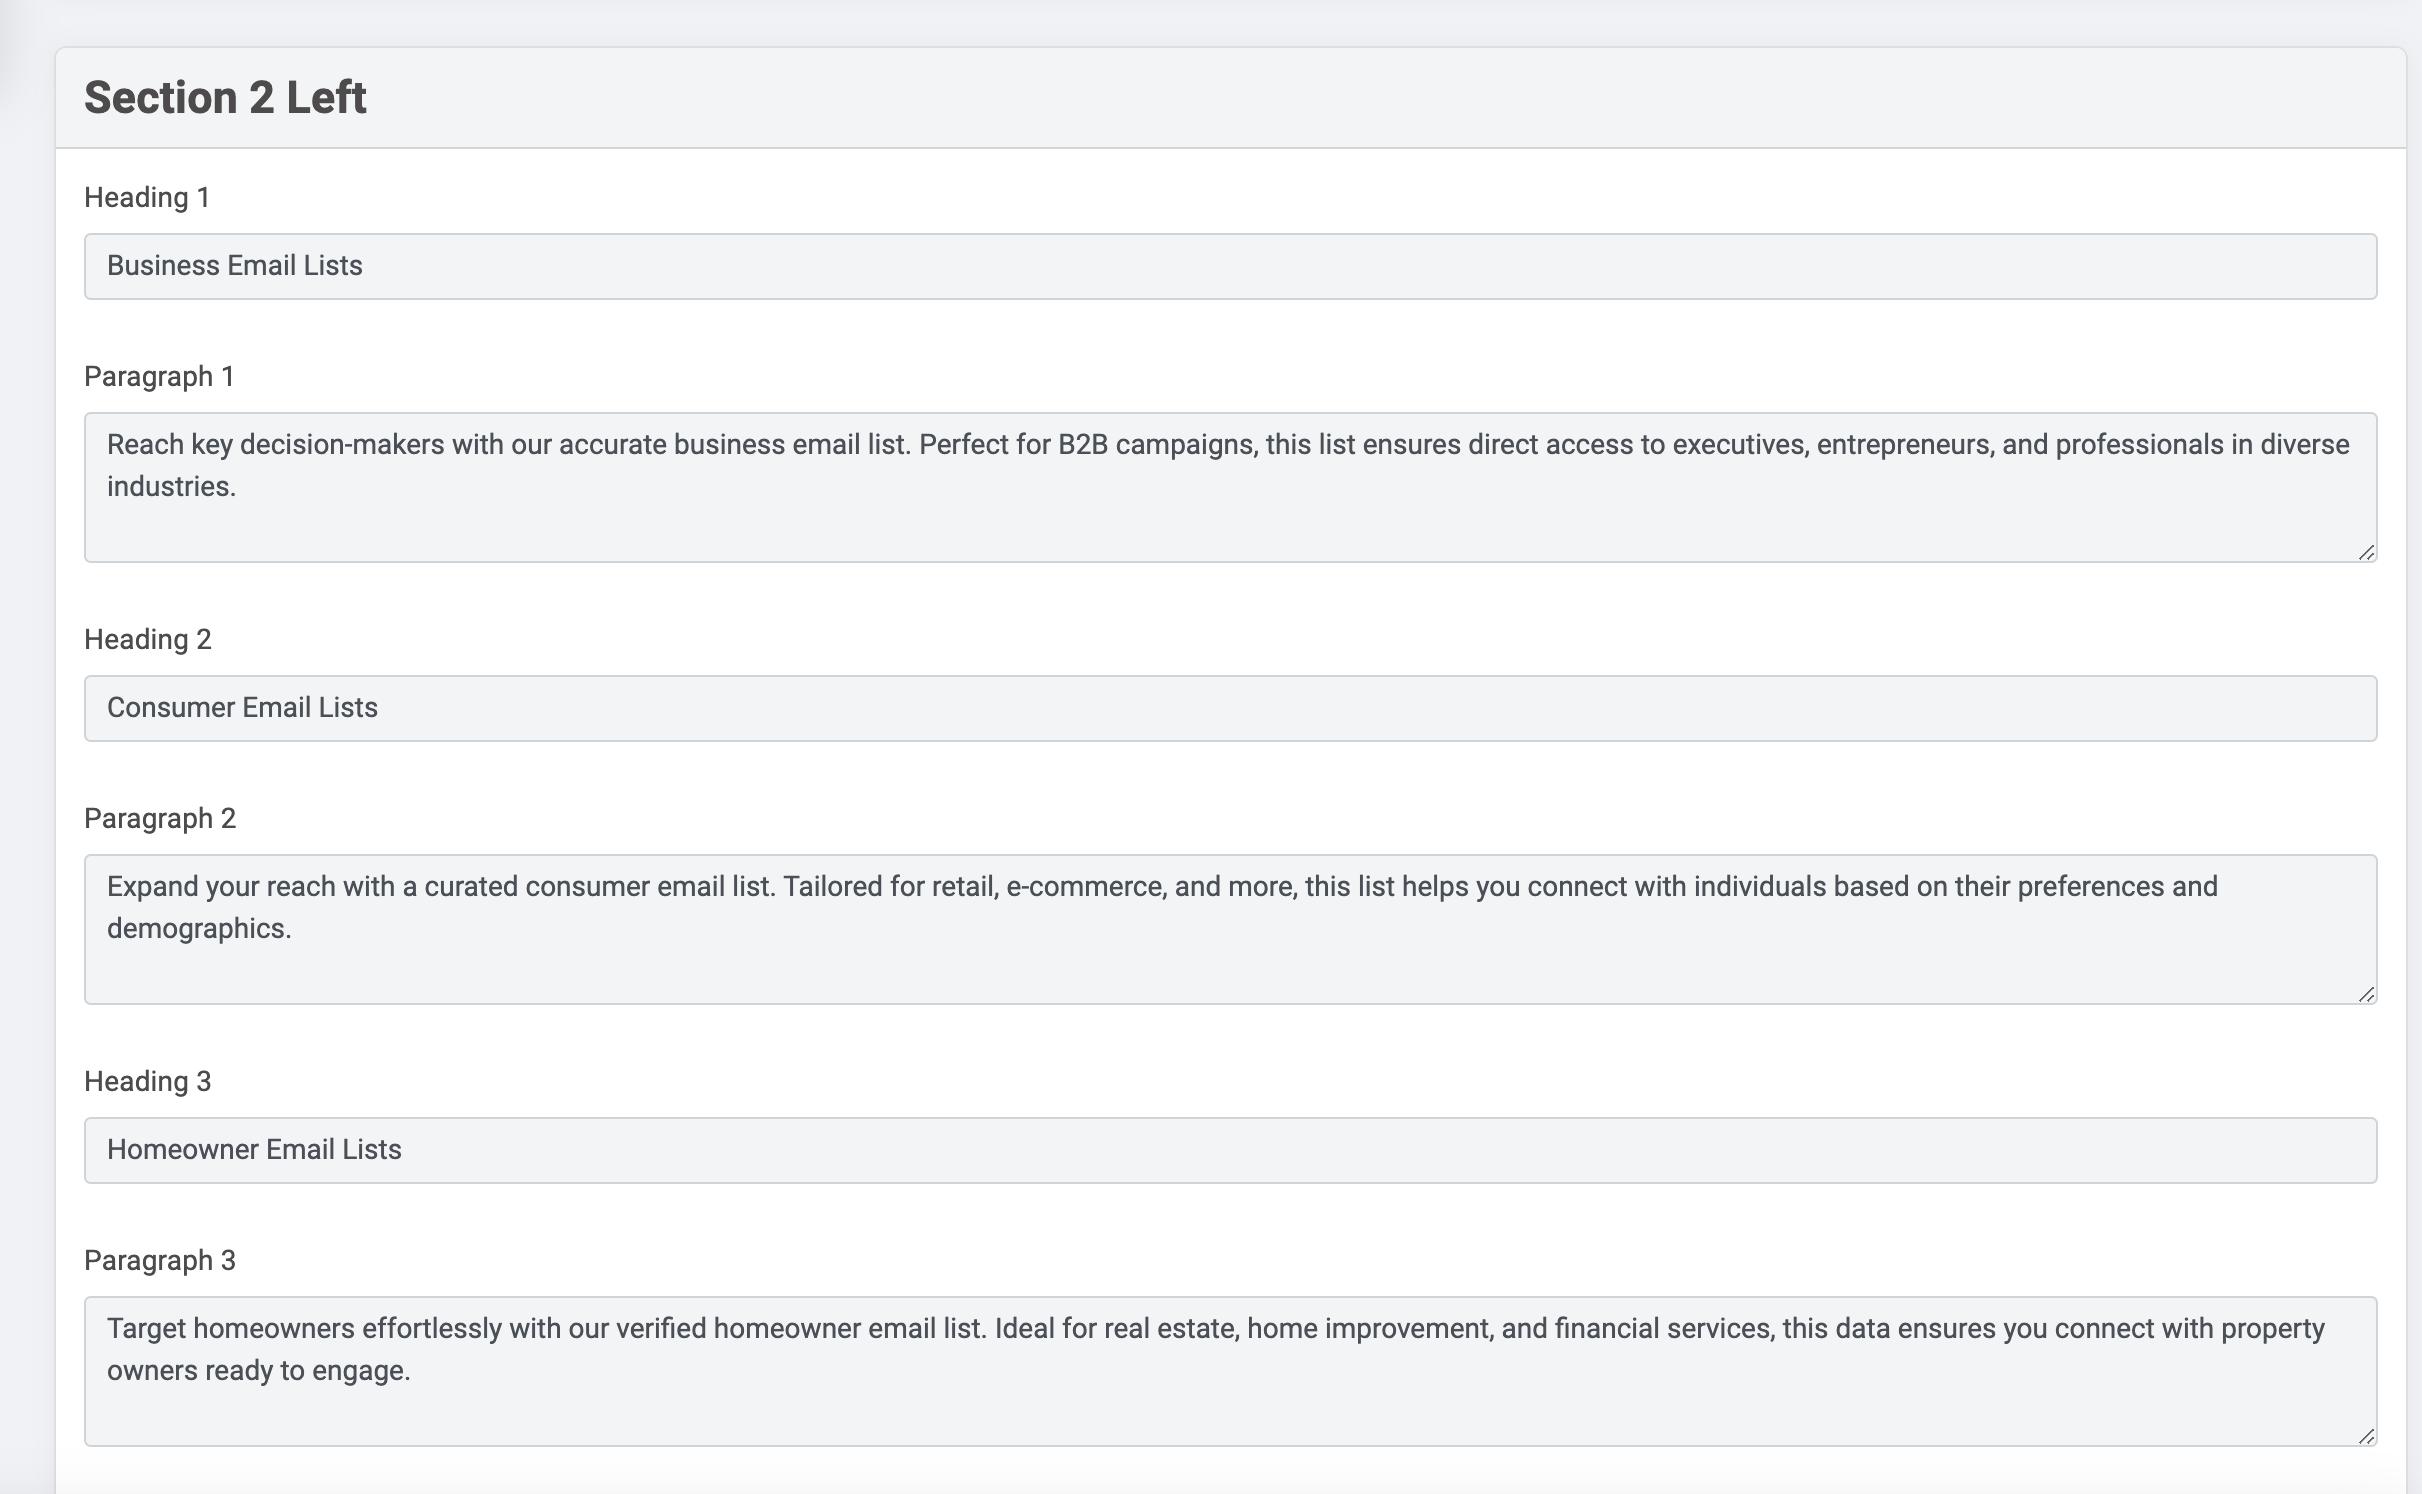
Populating with Content
Add valuable content to your website to inform and engage your visitors. This includes text, images, and interactive elements.
Content Implementation
- Copy and paste the prepared text content into the respective sections of your website.
- Adjust margins and alignment to ensure the content is well-formatted and easy to read.
- Regularly update your content to keep it relevant and engaging.
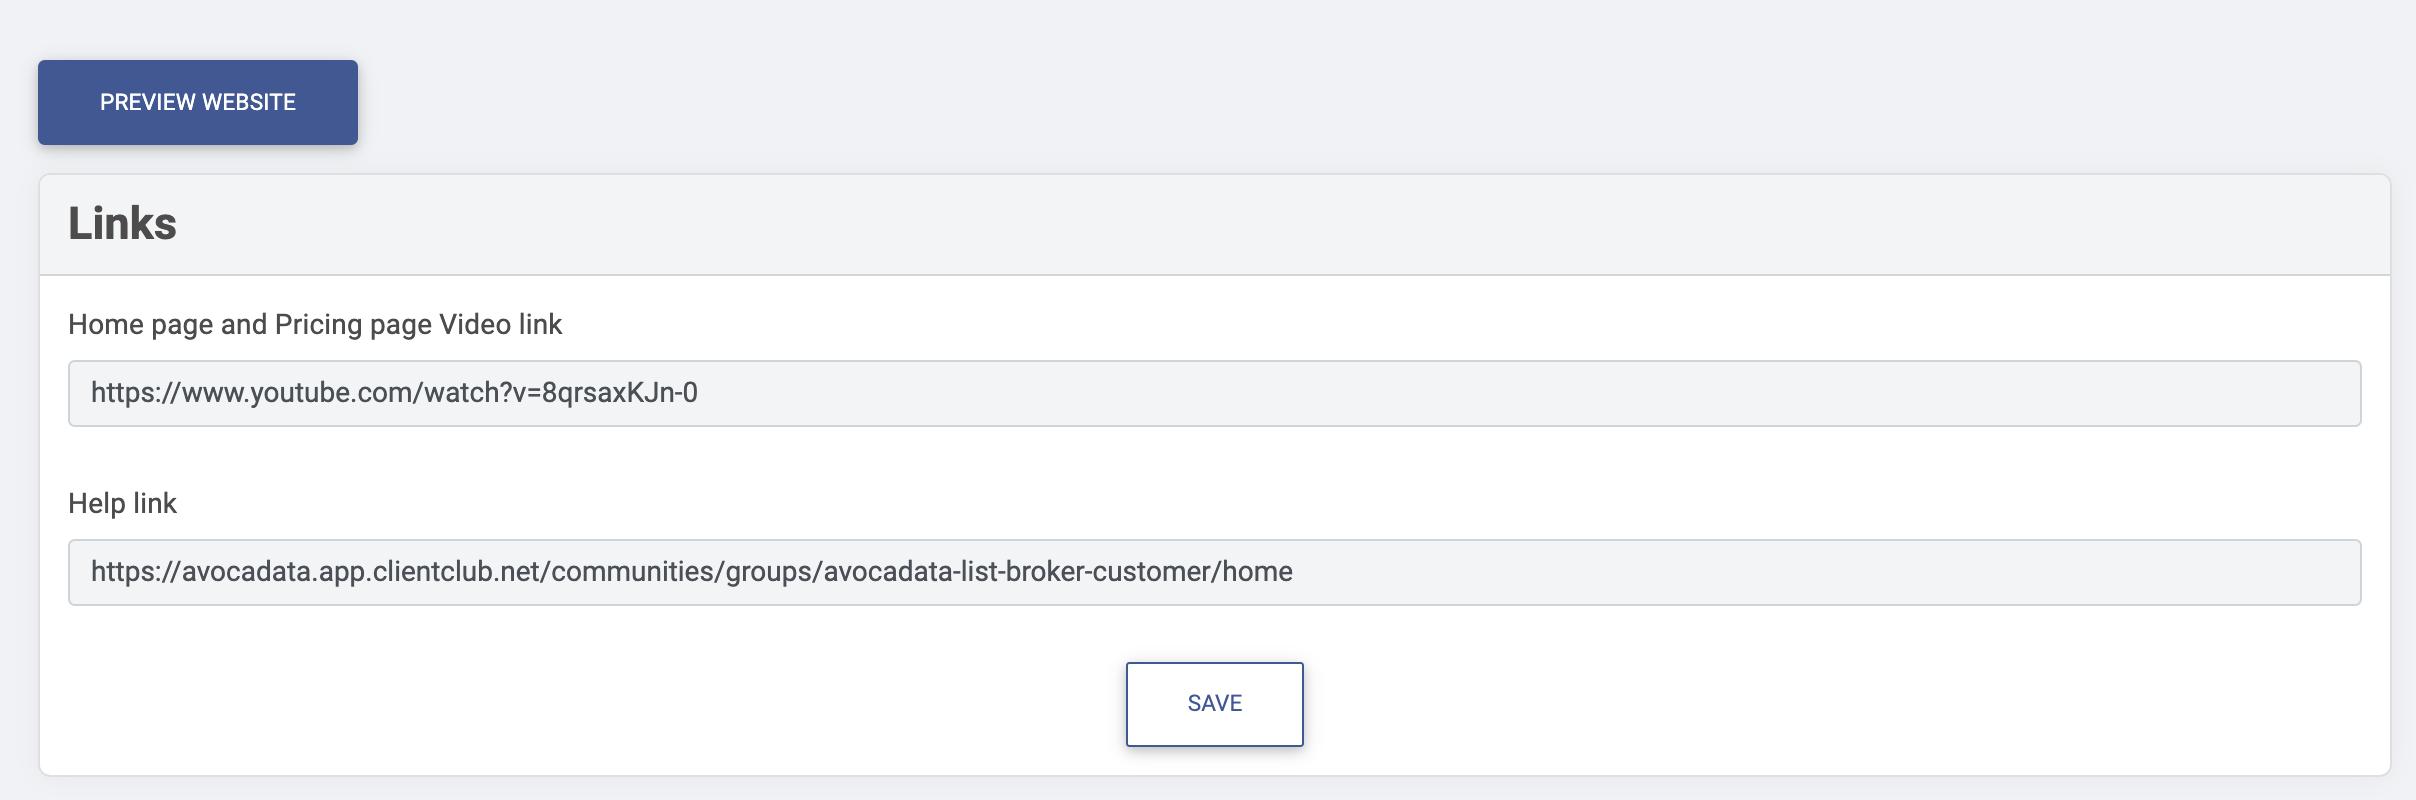
- Add buttons that redirect to key pages, such as the registration or subscription pages.
- Include links to videos, help sections, and subscription forms to enhance functionality.
Understanding the Example Code
The following code provides styling and structure for images and buttons on your website. Let's break it down to understand each component and how it contributes to the overall functionality and aesthetics of your site.
<!-- CSS Styles -->
<style>
    /* Styling for the image with ID 'img1' */
    #img1 {
        width: 100%; /* Makes the image take up the full width of its container */
        height: auto; /* Maintains the aspect ratio of the image */
        box-shadow: 0 4px 8px rgba(0, 0, 0, 0.1); /* Adds a subtle shadow for depth */
        border: 2px solid #ffffff; /* Adds a white border around the image */
    }

    /* Container for images to ensure proper padding and box sizing */
    .container-for-image {
        width: 100%;
        padding: 5px;
        box-sizing: border-box; /* Includes padding in the element's total width and height */
    }

    /* Responsive design: Adjust image size on smaller screens */
    @media (max-width: 768px) {
        #img1 {
            max-width: 100%; /* Ensures the image doesn't exceed its container's width */
        }
    }

    /* Styling for buttons */
    .button {
        background-color: #ff4500; /* Orange background color */
        color: white; /* White text color */
        padding: 12px 28px; /* Vertical and horizontal padding */
        font-size: 18px; /* Larger font size for prominence */
        font-weight: bold; /* Bold text */
        border: none; /* Removes default button border */
        border-radius: 6px; /* Rounded corners */
        cursor: pointer; /* Changes cursor to pointer on hover */
        text-decoration: none; /* Removes underline from text */
        display: inline-block; /* Allows setting width and height */
        margin: 5px; /* Adds space around buttons */
        transition: background-color 0.3s, transform 0.3s; /* Smooth transition for hover effects */
    }

    /* Hover effect for buttons */
    .button:hover {
        background-color: #cc3700; /* Darker orange on hover */
        transform: translateY(-2px); /* Slight upward movement on hover */
    }

    /* Container for buttons to align them centrally and responsively */
    .button-container {
        display: flex;
        justify-content: center; /* Centers buttons horizontally */
        flex-wrap: wrap; /* Allows buttons to wrap to the next line on smaller screens */
        gap: 10px; /* Adds space between buttons */
        margin: 20px 0; /* Vertical spacing above and below the container */
    }

    /* Responsive design: Adjust button styles on very small screens */
    @media (max-width: 460px) {
        .button {
            width: 100%; /* Makes buttons full-width on small screens */
            padding: 10px; /* Adjusts padding for smaller screens */
            font-size: 16px; /* Slightly smaller font size */
        }
    }
</style>

<!-- HTML Structure -->
<p><u><strong>Navigating the lead market effectively</strong></u> demands a <strong>strategic approach</strong>. Choose from a diverse array of lead types:</p>

<ul>
    <li><strong>Aged Insurance Leads:</strong> Tap into a pool of potential customers already interested in insurance products.</li>
    <li><strong>Aged Solar Leads:</strong> Verified leads with up-to-date information, ideal for solar campaigns.</li>
    <li><strong>Business Leads:</strong> Connect directly with decision-makers for streamlined B2B efforts.</li>
    <li><strong>Consumer Leads:</strong> Engage individual customers with tailored marketing strategies.</li>
    <li><strong>Homeowner Leads:</strong> Target property owners for real estate or home services.</li>
    <li><strong>Data Enrichment Services:</strong> Enhance the accuracy and effectiveness of your leads.</li>
</ul>

<!-- Button Container -->
<div class="button-container">
    <a href="https://app.avocadata.com/register.php">
        <button class="button">Free Sign Up</button>
    </a>
    <a href="https://app.avocadata.com/tutorial.php">
        <button class="button">Watch Demo</button>
    </a>
</div>
### Breakdown of the Code:
-
CSS Styling:
-
#img1: This ID selector targets a specific image to apply custom styles, such as full-width display, responsive resizing, a subtle box shadow for depth, and a white border to make it stand out against the background. -
.container-for-image: This class ensures that any image wrapped within this container has appropriate padding and uses thebox-sizingproperty to include padding within the element's total width and height. -
.button: This class styles buttons with a vibrant orange background, white bold text, padding for size, rounded corners, and smooth transitions for hover effects. The hover state darkens the button and gives a slight upward movement to indicate interactivity. -
.button-container: This flex container centers the buttons horizontally, allows them to wrap on smaller screens, and provides consistent spacing between them. -
@media queries: These ensure that the design remains responsive. On screens narrower than 768px, the image adjusts to fit its container. On screens narrower than 460px, the buttons become full-width with adjusted padding and font sizes for better accessibility and usability.
-
-
HTML Structure:
-
<p>and<ul>: These elements provide descriptive text and a list of lead types, enhancing the informational content of your website. -
<div class="button-container">: This container holds the call-to-action buttons. Each button is wrapped within an anchor tag (<a>) to make the entire button area clickable, directing users to the respective pages. -
<button class="button">: These buttons utilize the previously defined CSS classes to ensure consistent styling and responsive behavior. The "Free Sign Up" button encourages users to register, while the "Watch Demo" button directs them to a tutorial or demonstration video.
-
### How to Implement This Code:
-
Add the CSS Styles:
Place the
<style>block within the<head>section of your HTML document. This ensures that the styles are applied before the page content loads. -
Insert the HTML Structure:
Within the relevant section of your webpage (in this case, the "Populating with Content" section), paste the provided HTML structure. This includes the descriptive paragraph, the list of lead types, and the button container.
-
Customize the Content:
Modify the text within the paragraphs and list items to fit your specific offerings and messaging. Ensure that the links in the anchor tags (
<a href="...">) point to the correct registration and tutorial pages on your website. -
Ensure Responsiveness:
Test your webpage on various devices and screen sizes to verify that the images and buttons adjust appropriately. The media queries included in the CSS handle most responsiveness, but adjustments might be necessary based on your specific design and content.
-
Enhance Accessibility:
Consider adding ARIA labels or other accessibility features to improve the user experience for all visitors. For example, you can add
aria-labelattributes to buttons for better screen reader support.
### Final Thoughts:
By incorporating this code into your website, you create a visually appealing and user-friendly interface that guides visitors through your offerings. The responsive design ensures that your content looks great on all devices, while the interactive buttons encourage user engagement and conversions.
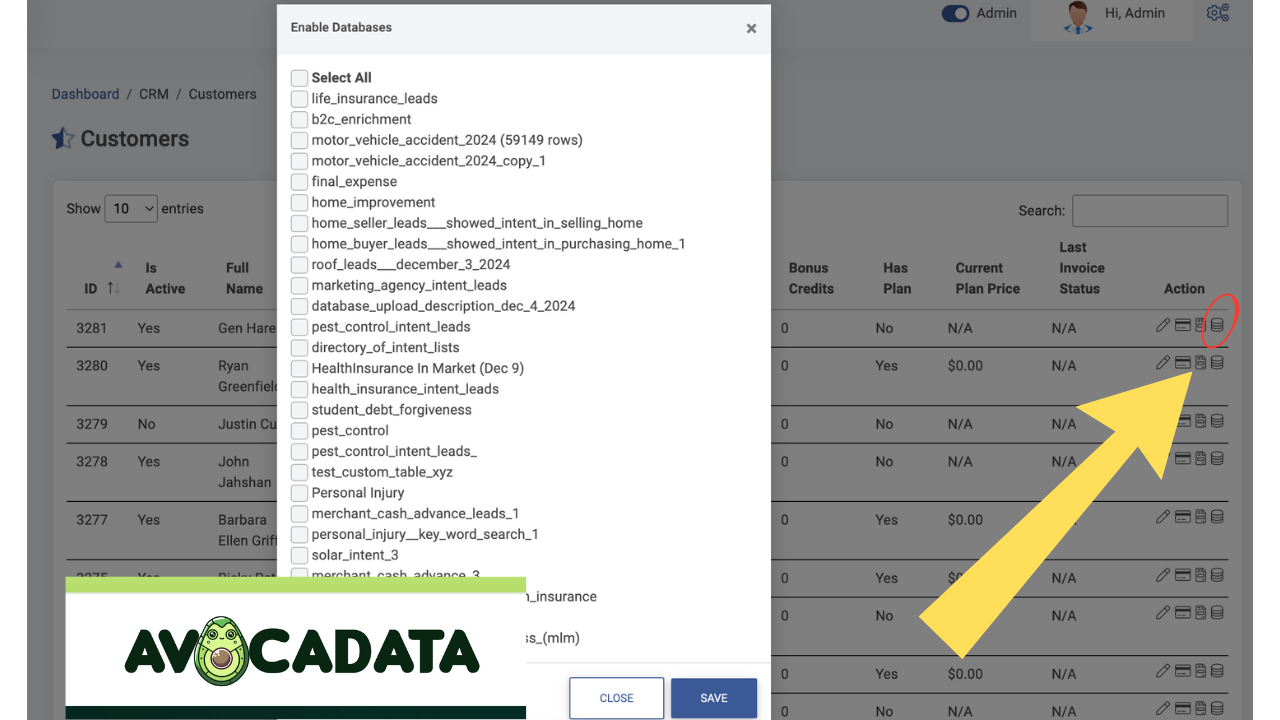
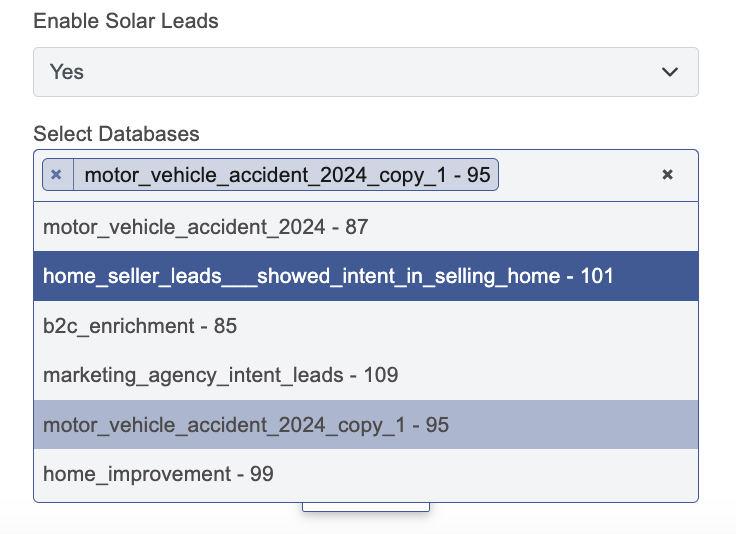
Assigning Databases to Users
Once you have purchased a database, you can assign it to users individually or incorporate it into customized plans. This ensures that each user or plan has access to the specific data they need, enhancing the user experience and streamlining data management.
Assigning a Database to a Specific User
-
Navigate to Customers and CRM:
From your white label dashboard, go to the Customers and CRM section.
-
Click the Database Icon:
Locate the user you want to assign the database to and click the small database icon next to their profile.
-
Assign the Database:
If the database is not already assigned to your white label, it won't appear here. Ensure that all databases you wish to assign have been purchased and are listed under the Purchase Database section.
-
Complete the Assignment:
Select the desired database from the list and assign it to the user. This grants the user access to the specific database you've allocated.